

Setup Wizard
The Authrim Setup Wizard provides an intuitive web-based interface for deploying Authrim to Cloudflare. This guide walks you through each step of the setup process.
Before You Begin
Section titled “Before You Begin”Requirements
Section titled “Requirements”Before running the setup wizard, ensure you have the following:
| Requirement | Details |
|---|---|
| Cloudflare Account | Free tier is sufficient for development. Check current Cloudflare Workers, D1, KV, R2, and Durable Objects limits before production use. |
| Node.js | Version 22 or later |
| npm | Included with Node.js |
Information to Prepare
Section titled “Information to Prepare”Having these ready will make the setup process smoother:
- Environment name: How you want to identify this deployment (e.g.,
prod,staging,dev) - Custom domain (optional): If you want to use your own domain instead of
*.workers.dev - Email service credentials (optional): API key from Resend or similar service for sending OTP emails
Cloudflare Plan Considerations
Section titled “Cloudflare Plan Considerations”| Area | Development Note | Production Note |
|---|---|---|
| OIDC/OAuth flows | Can be evaluated on small environments | Validate request, CPU, D1, KV, queue, and Durable Object limits |
| Custom domains | Optional for local and early testing | Confirm current Cloudflare plan and domain requirements |
| Storage profile | builtin:storage:shared-d1 is the default | Consider tenant-D1 or external database profiles for larger or regulated deployments |
| Audit/logging | Basic D1-backed paths are available | Plan retention, archive, R2, sink, and monitoring requirements |
Starting the Setup Wizard
Section titled “Starting the Setup Wizard”Run the following command to start the setup wizard:
npx @authrim/setupThe wizard will:
- Check prerequisites (Wrangler CLI and Cloudflare authentication)
- Download the Authrim source code (if not present)
- Open a web browser with the setup UI
Step 1: Prerequisites Check
Section titled “Step 1: Prerequisites Check”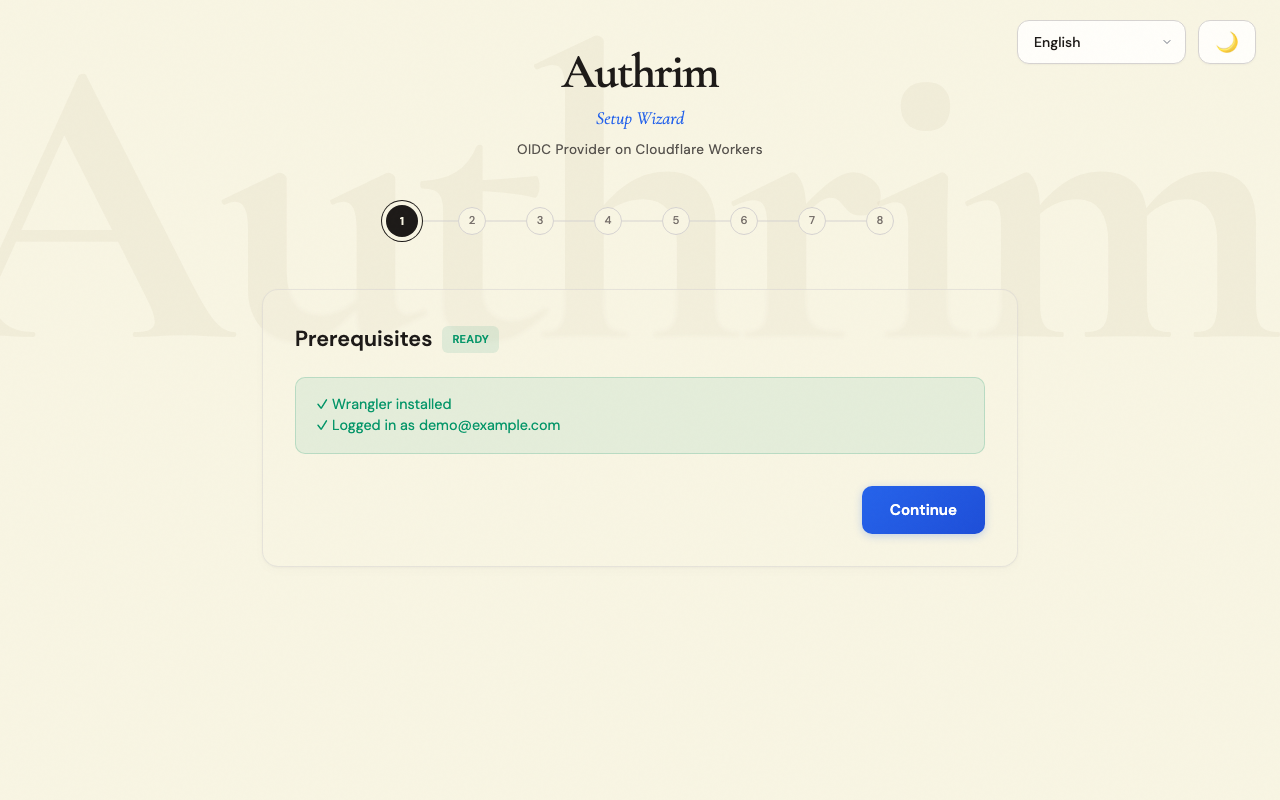
The wizard verifies your environment is ready:
Wrangler CLI
Section titled “Wrangler CLI”The Cloudflare command-line tool used to deploy Workers. If not installed:
npm install -g wranglerCloudflare Authentication
Section titled “Cloudflare Authentication”You must be logged in to your Cloudflare account. If not authenticated:
wrangler loginThis opens a browser window to complete OAuth authentication with Cloudflare.
What the wizard checks
Section titled “What the wizard checks”- ✅ Wrangler is installed and accessible
- ✅ You’re logged in to Cloudflare
- ✅ Your account ID is valid
- ✅ Current working directory is writable
Step 2: Main Menu
Section titled “Step 2: Main Menu”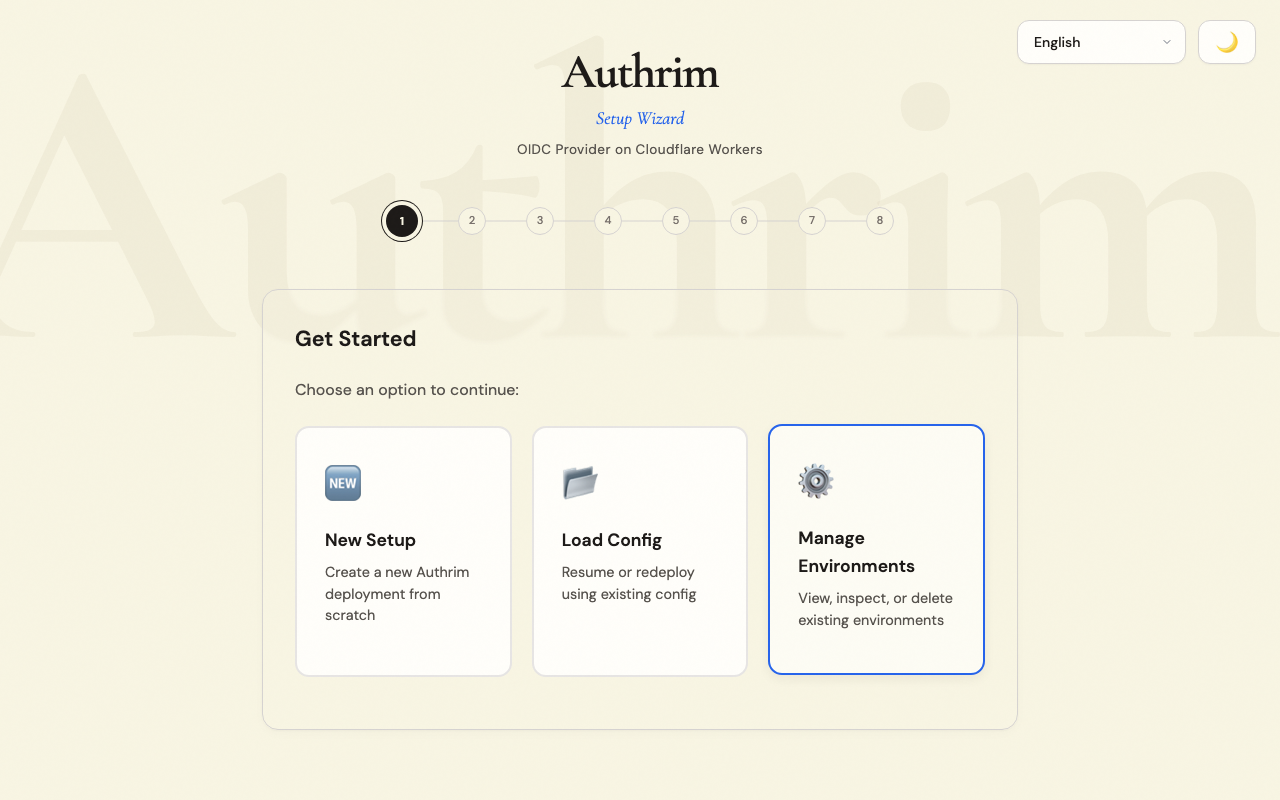
Choose from three options:
| Option | When to Use |
|---|---|
| New Setup | First time deploying Authrim, or creating a new environment |
| Load Configuration | You have a saved authrim-config.json from a previous setup |
| Manage Environments | View, update, or delete existing deployments |
Step 3: Setup Mode
Section titled “Step 3: Setup Mode”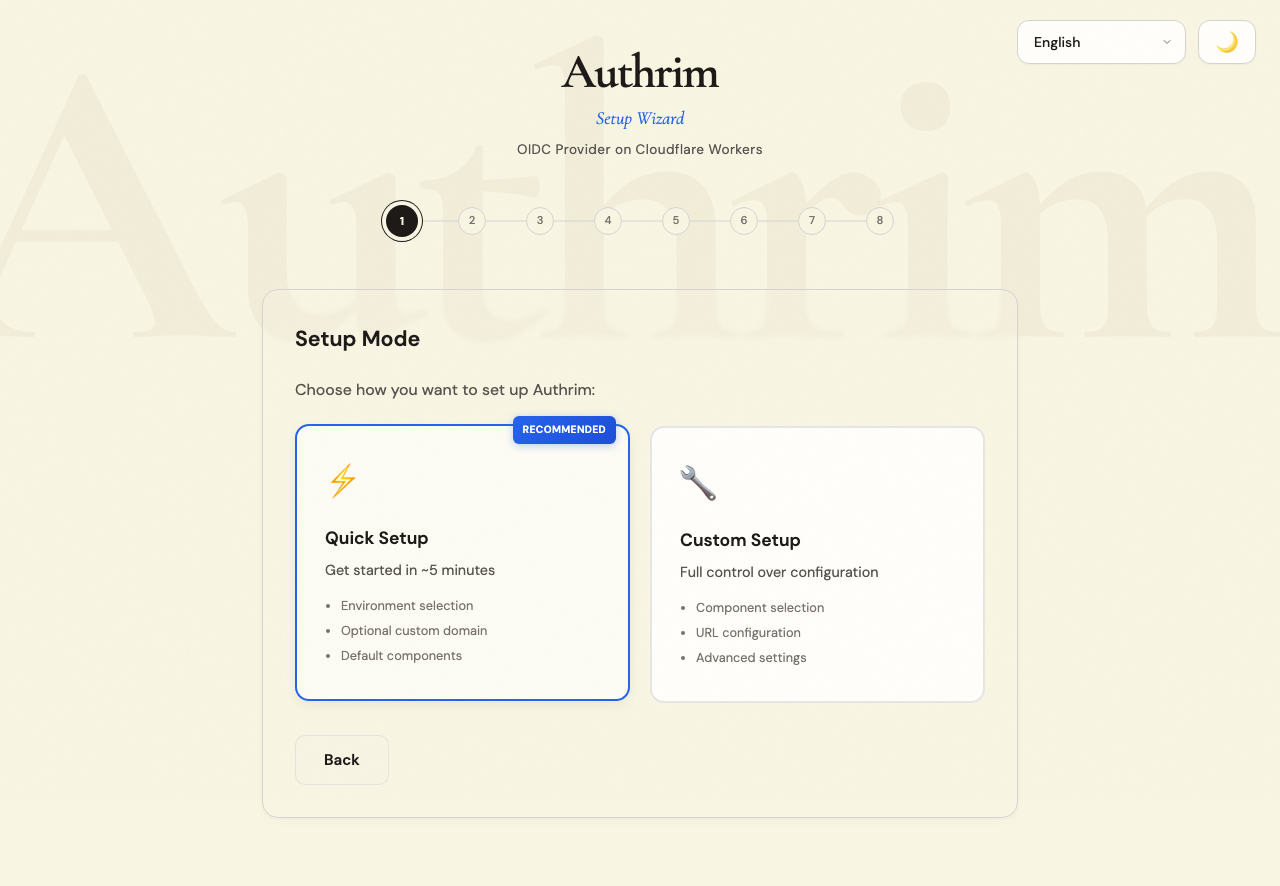
Quick Setup (Recommended)
Section titled “Quick Setup (Recommended)”Best for most users. Automatically configures:
- Standard OIDC/OAuth workers (
ar-auth,ar-token,ar-userinfo,ar-discovery,ar-management) - Login UI and Admin UI workers
- Default shared-D1 storage profile
- Sensible security defaults
Custom Setup
Section titled “Custom Setup”Choose this if you need to:
- Choose tenant-D1 storage and preallocated tenant database slots
- Configure SAML, Device Flow, CIBA, external IdP bridge, policy, or Verifiable Credentials behavior
- Fine-tune domains, UI deployment, runtime profiles, and advanced settings
Step 4: Configuration
Section titled “Step 4: Configuration”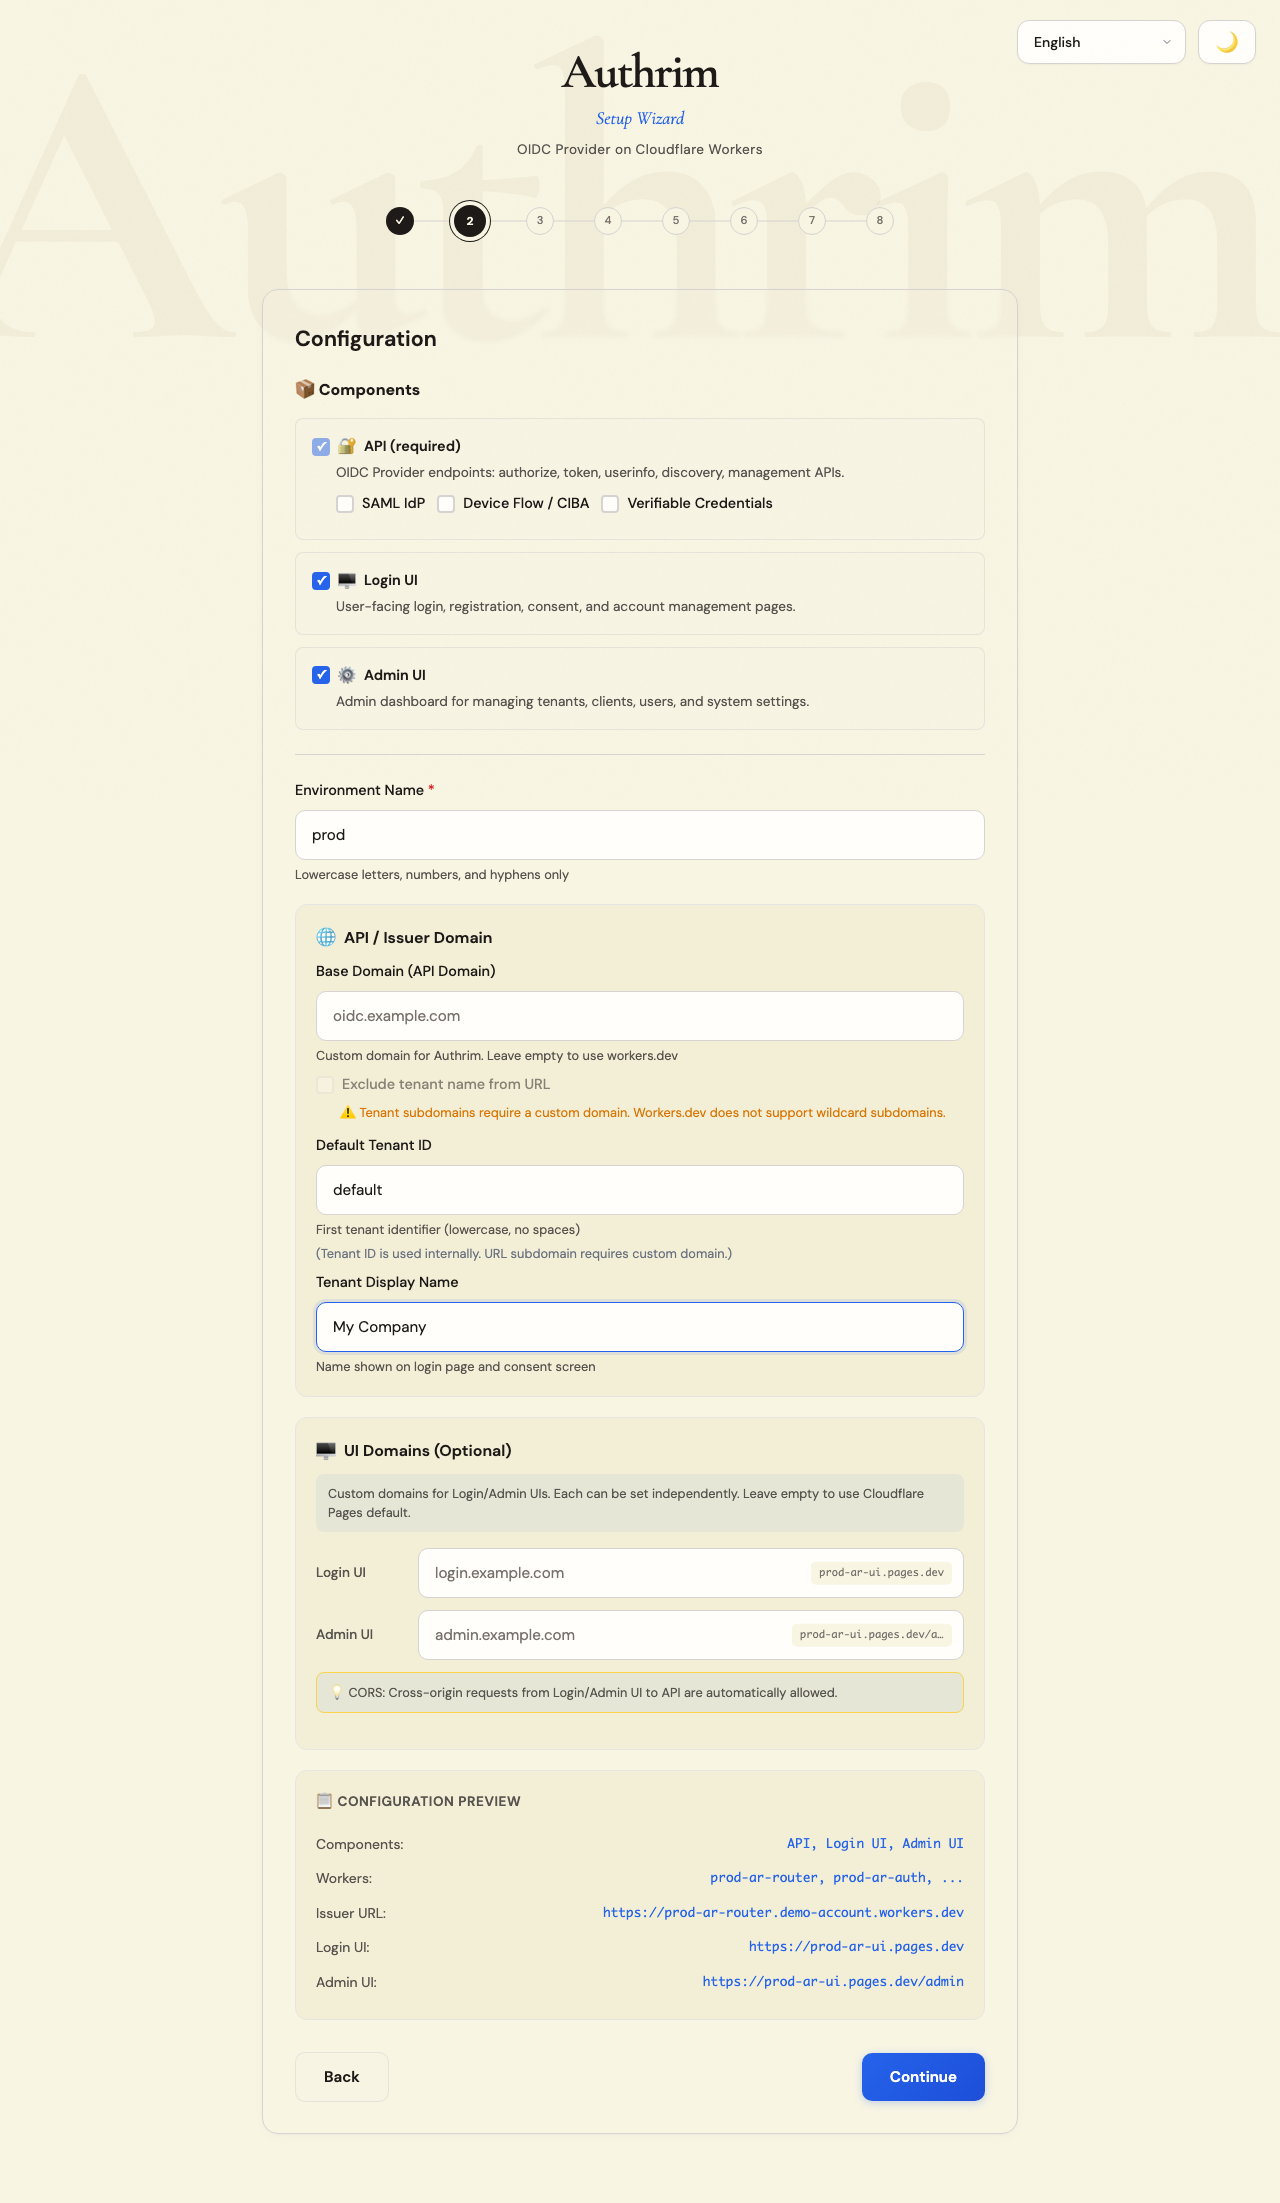
Environment Name
Section titled “Environment Name”The environment name is a unique identifier for this deployment. It’s used as a prefix for all Cloudflare resources.
Recommended naming:
| Environment | Use Case |
|---|---|
prod | Production - live users |
staging | Pre-production testing |
dev | Development and experimentation |
You can run multiple environments simultaneously (e.g., prod and staging) under the same Cloudflare account.
Domain Configuration
Section titled “Domain Configuration”Option 1: Use workers.dev (Default)
Section titled “Option 1: Use workers.dev (Default)”- No additional setup required
- URLs look like:
https://prod-ar-router.your-account.workers.dev - Good for development and testing
- Limitation: No wildcard subdomains for multi-tenant URLs
Option 2: Custom Domain
Section titled “Option 2: Custom Domain”- Check the current Cloudflare Workers custom domain requirements for your account and plan
- URLs look like:
https://auth.yourdomain.com - Professional appearance for production
- Supports multi-tenant subdomains:
https://tenant1.auth.yourdomain.com
To use a custom domain:
- Add your domain to Cloudflare (DNS management)
- Enter the domain in the setup wizard
- The wizard will configure the necessary DNS records
Naked Domain Option
Section titled “Naked Domain Option”When checked, your issuer URL will be https://auth.yourdomain.com instead of https://default.auth.yourdomain.com. Choose this if:
- You only need a single tenant
- You prefer cleaner URLs
Default Tenant
Section titled “Default Tenant”Authrim supports multiple tenants (organizations) under one deployment.
- Tenant ID: Internal identifier (e.g.,
default,acme,corp) - Display Name: Shown on login screens (e.g., “My Company”, “ACME Corp”)
For single-tenant setups, you can leave the defaults.
UI Domains (Optional)
Section titled “UI Domains (Optional)”By default, Login UI and Admin UI are deployed as Cloudflare Workers with generated URLs. You can optionally configure custom domains for each.
Step 5: Database Configuration
Section titled “Step 5: Database Configuration”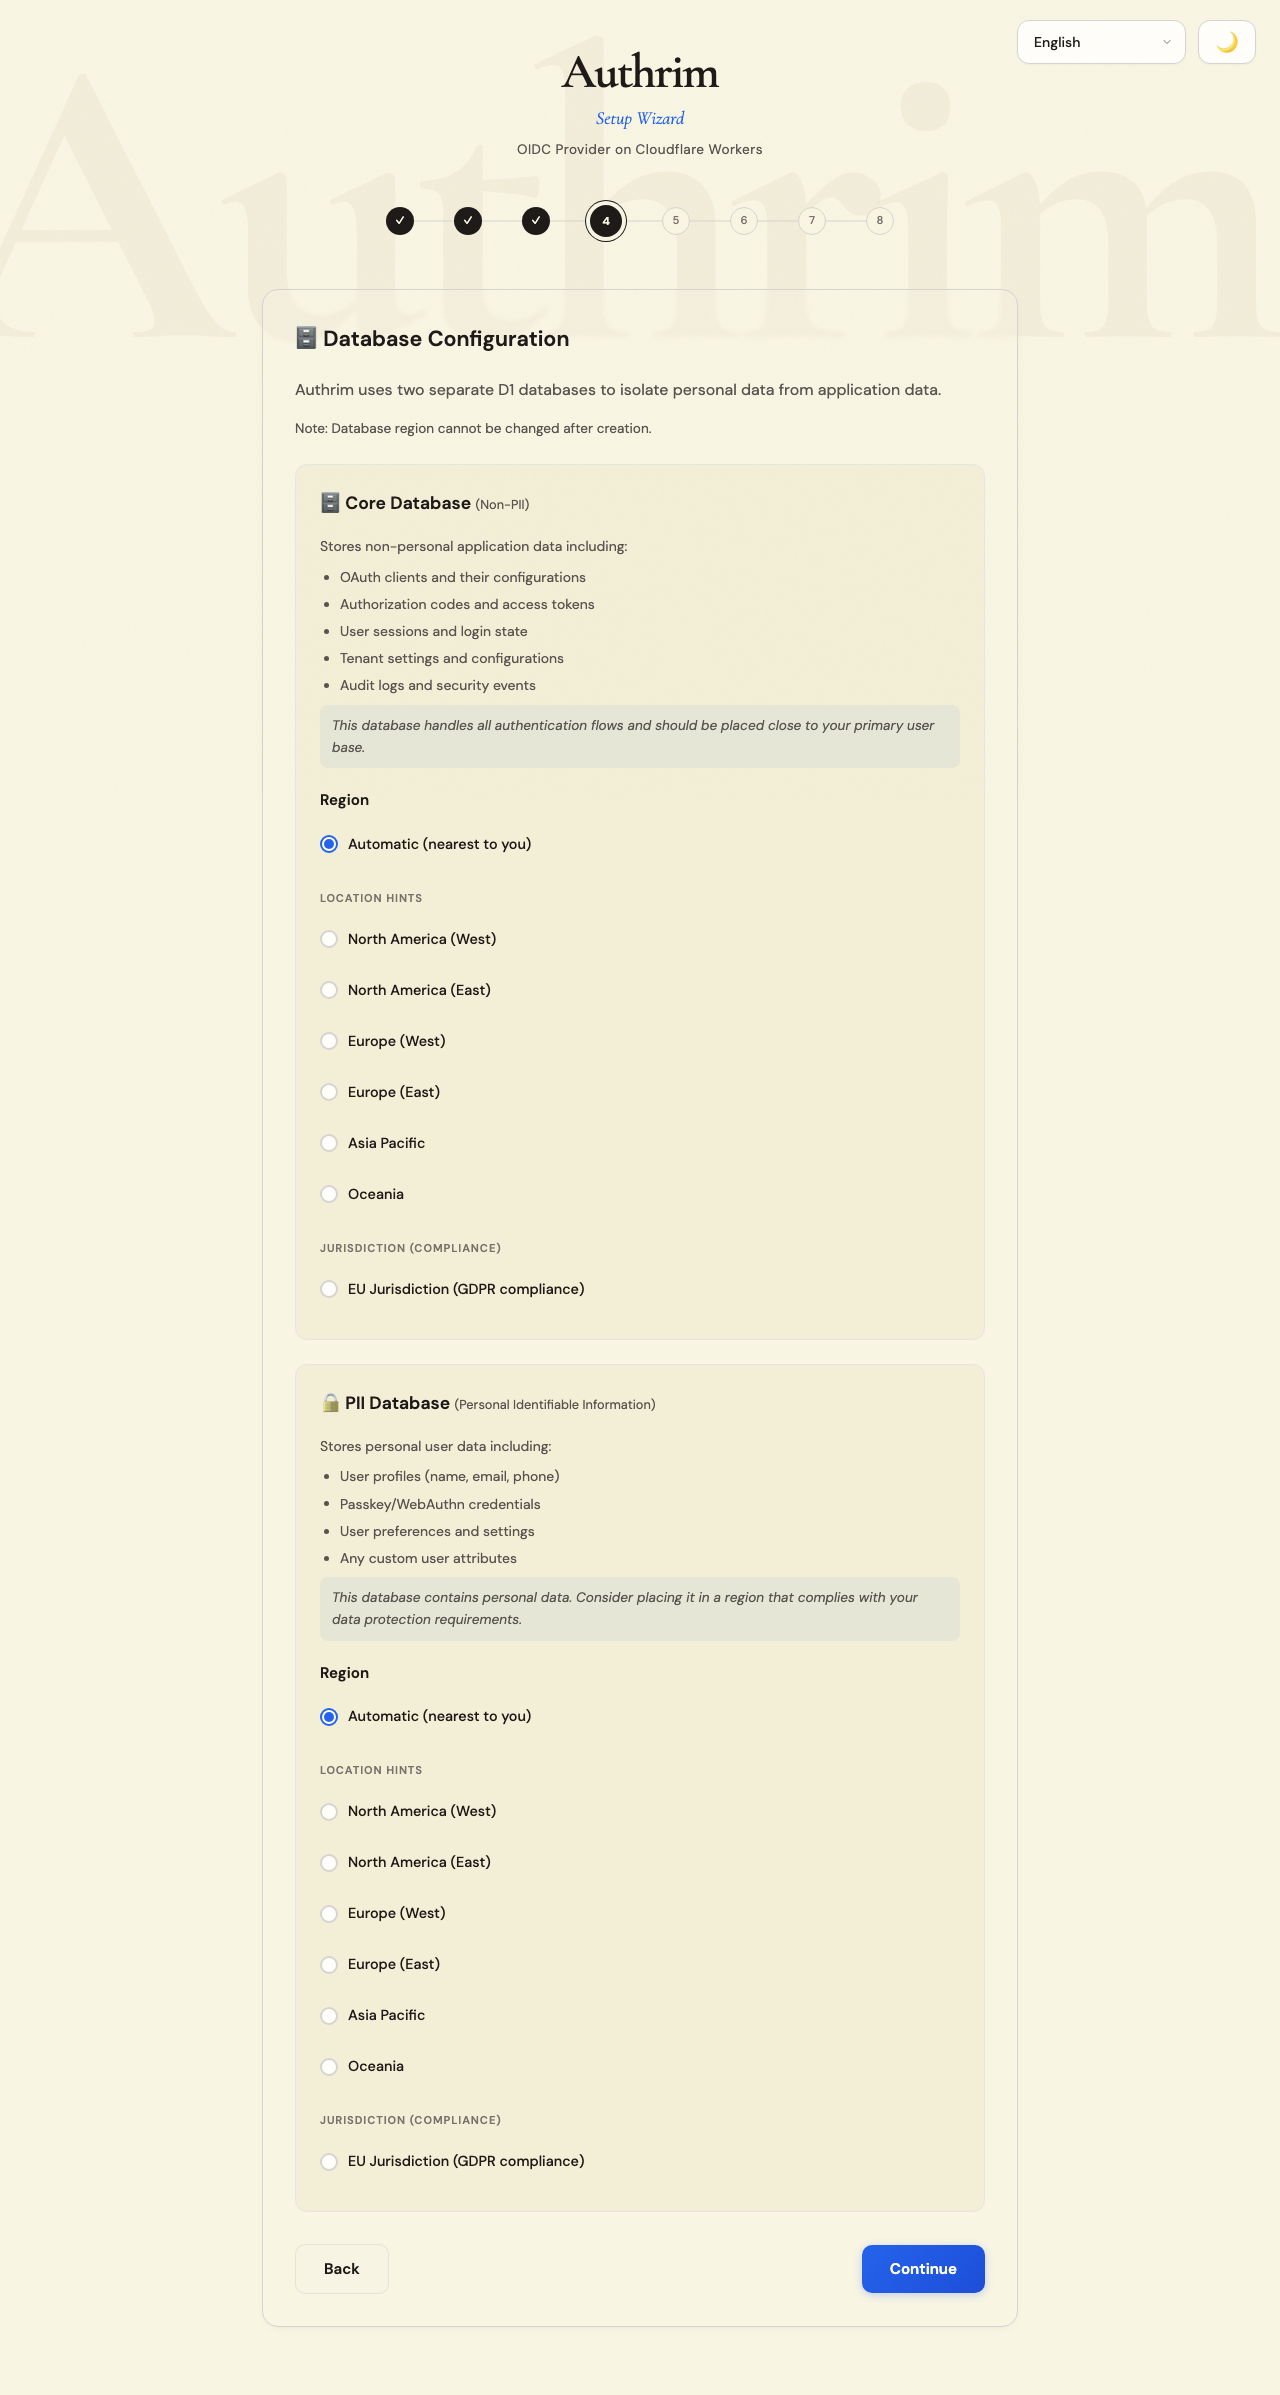
Authrim now uses runtime storage profiles. The default builtin:storage:shared-d1 profile creates three deployment-level D1 databases:
| Binding | Database | Contains |
|---|---|---|
DB | Core database | OAuth/OIDC core data, policy, consent, passkeys, custom-claim metadata, and transient auth persistence |
DB_PII | PII database | Sensitive identity values, subject identifiers, linked identity records, PII tombstones, and PII audit data |
DB_ADMIN | Admin/control database | Admin users, admin RBAC, runtime profiles, tenant database registry, audit/logging control data, and operational jobs |
For larger or regulated deployments, the setup flow can use builtin:storage:tenant-d1. In that mode, control data remains shared while tenant-owned core and PII data are routed through generated tenant database bindings and the tenant database registry.
Why separate storage planes?
- Compliance: PII and admin/control data can be handled with clearer boundaries
- Security: Admin, audit, core identity, and PII access paths can be reviewed independently
- Tenant scale: tenant-D1 mode can route tenant-owned slices to generated tenant databases
- Portability: supported profiles can route selected slices to external database adapters
Storage Profile Choices
Section titled “Storage Profile Choices”| Profile | Best For | Notes |
|---|---|---|
builtin:storage:shared-d1 | Small deployments and evaluation | Uses shared DB, DB_PII, and DB_ADMIN bindings |
builtin:storage:tenant-d1 | Larger multi-tenant deployments | Uses preallocated/generated tenant DB slots for tenant-owned data |
| External database profiles | Regulated or existing-data-platform environments | Uses connection references rather than storing raw credentials in tenant settings |
Choosing a Region
Section titled “Choosing a Region”Select the region based on:
| Consideration | Recommendation |
|---|---|
| User location | Choose a region close to most users when possible |
| Data residency laws | If your users are in the EU, consider WEUR for GDPR compliance |
| Corporate requirements | Some organizations mandate specific data locations |
Available regions:
- Automatic: Cloudflare selects the nearest region (good for global users)
- WNAM: Western North America (US West Coast)
- ENAM: Eastern North America (US East Coast)
- WEUR: Western Europe (good for EU data residency)
- APAC: Asia Pacific
Important: Database region cannot be changed after creation. Choose carefully for production deployments.
Typical configurations
Section titled “Typical configurations”| Scenario | Storage Profile | Region Guidance |
|---|---|---|
| Small evaluation | builtin:storage:shared-d1 | Automatic or nearest primary user region |
| EU PII requirements | builtin:storage:shared-d1 or tenant-D1 with EU-oriented residency profile | Place PII-bearing storage in an EU-compatible region where required |
| Larger multi-tenant deployment | builtin:storage:tenant-d1 | Plan tenant slot count and migration rollout |
| Existing database platform | External database profile | Use approved connection references and residency controls |
Step 6: Email Configuration
Section titled “Step 6: Email Configuration”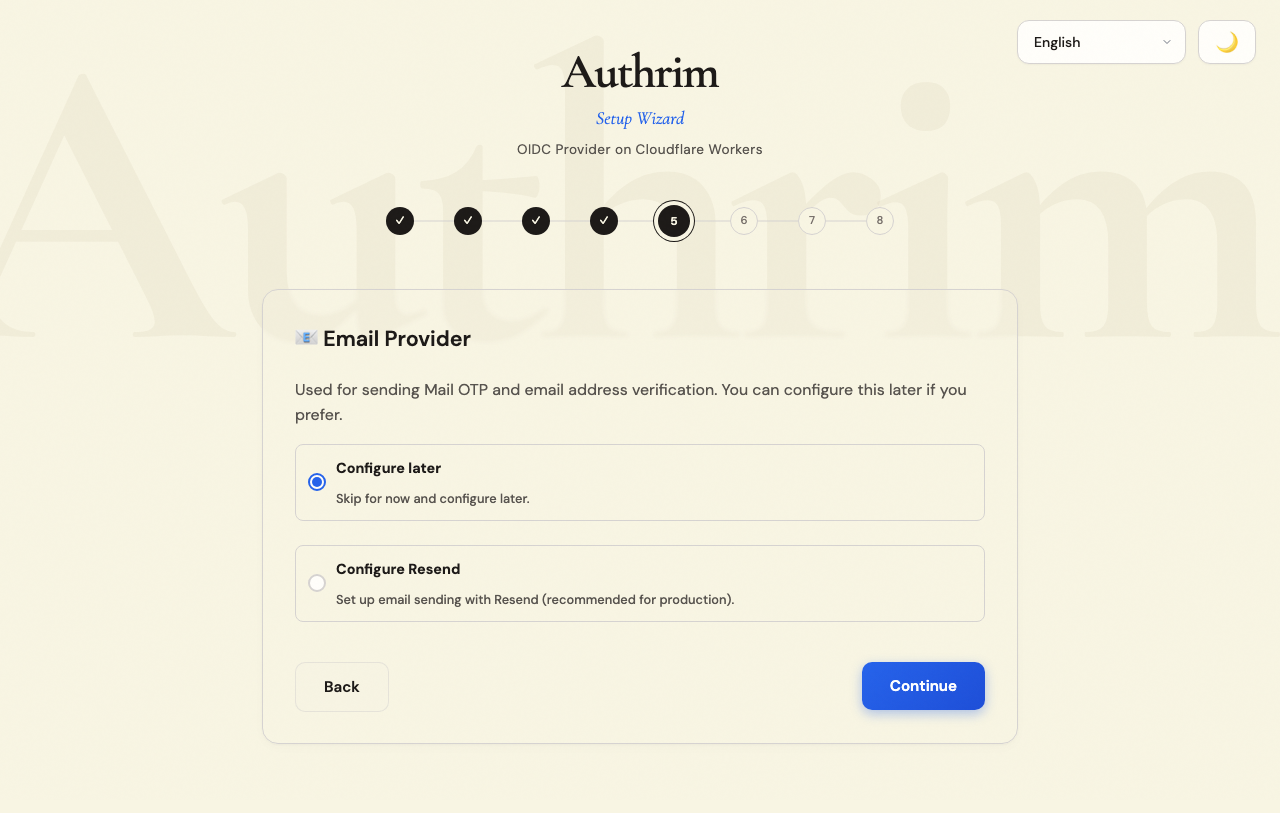
Email is used for:
- One-Time Password (OTP) verification during login
- Password reset links
- Account verification emails
Configure Now (Recommended for Production)
Section titled “Configure Now (Recommended for Production)”Resend is recommended for its simplicity and free tier:
- Create an account at resend.com
- Add and verify your domain (requires DNS access)
- Generate an API key
- Enter in the wizard:
- API Key: Your Resend API key
- From Address: e.g.,
[email protected](must be from your verified domain)
Skip for Now (Development Only)
Section titled “Skip for Now (Development Only)”If you skip email configuration:
- Email Code values are logged to the console (visible in Cloudflare dashboard logs)
- Password reset won’t work
- Good for development, not suitable for production
You can configure email later through the Admin UI.
Step 7: Save Configuration (Optional)
Section titled “Step 7: Save Configuration (Optional)”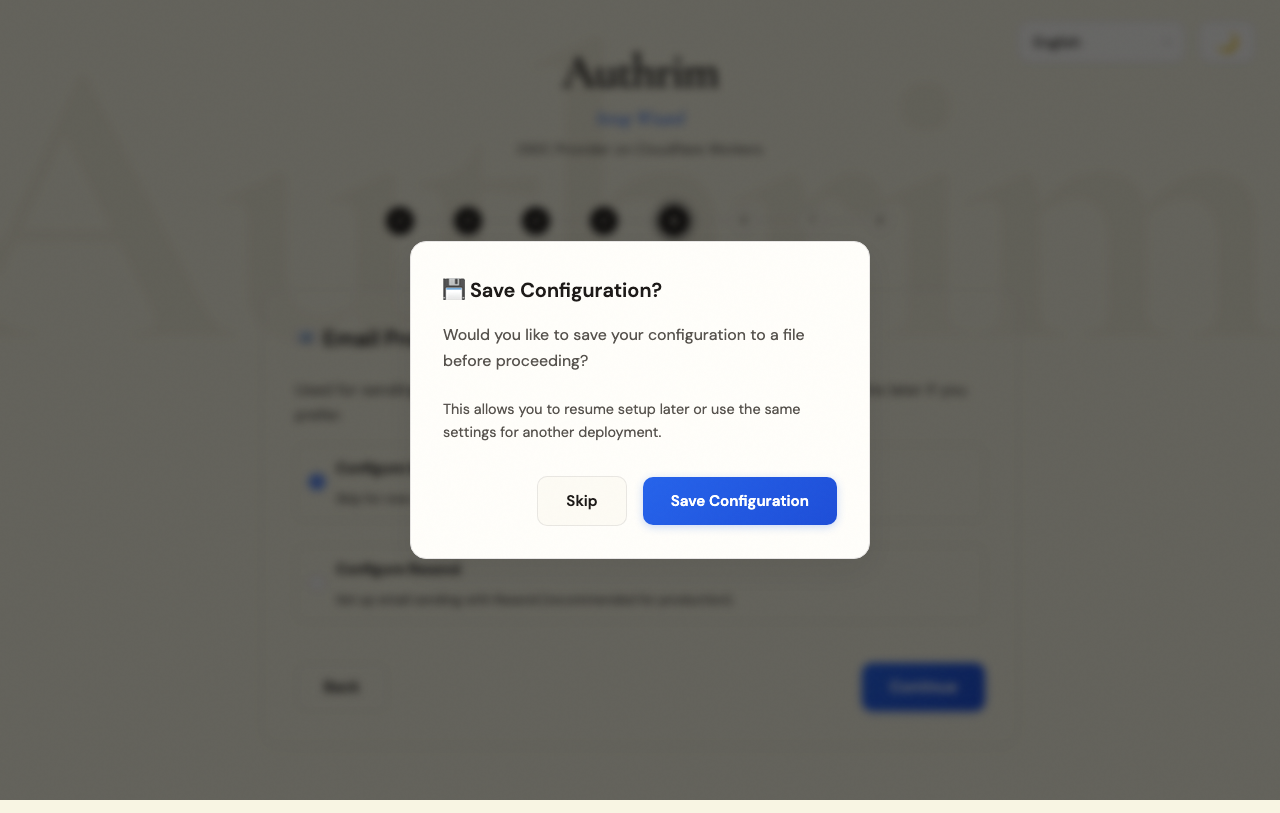
Before provisioning, you can save your configuration to a JSON file.
Benefits of saving:
- Resume setup later if interrupted
- Create identical environments (e.g., staging from prod config)
- Version control your infrastructure settings
- Share configuration with team members
The file is saved as authrim-config.json in your current directory.
Step 8: Provisioning
Section titled “Step 8: Provisioning”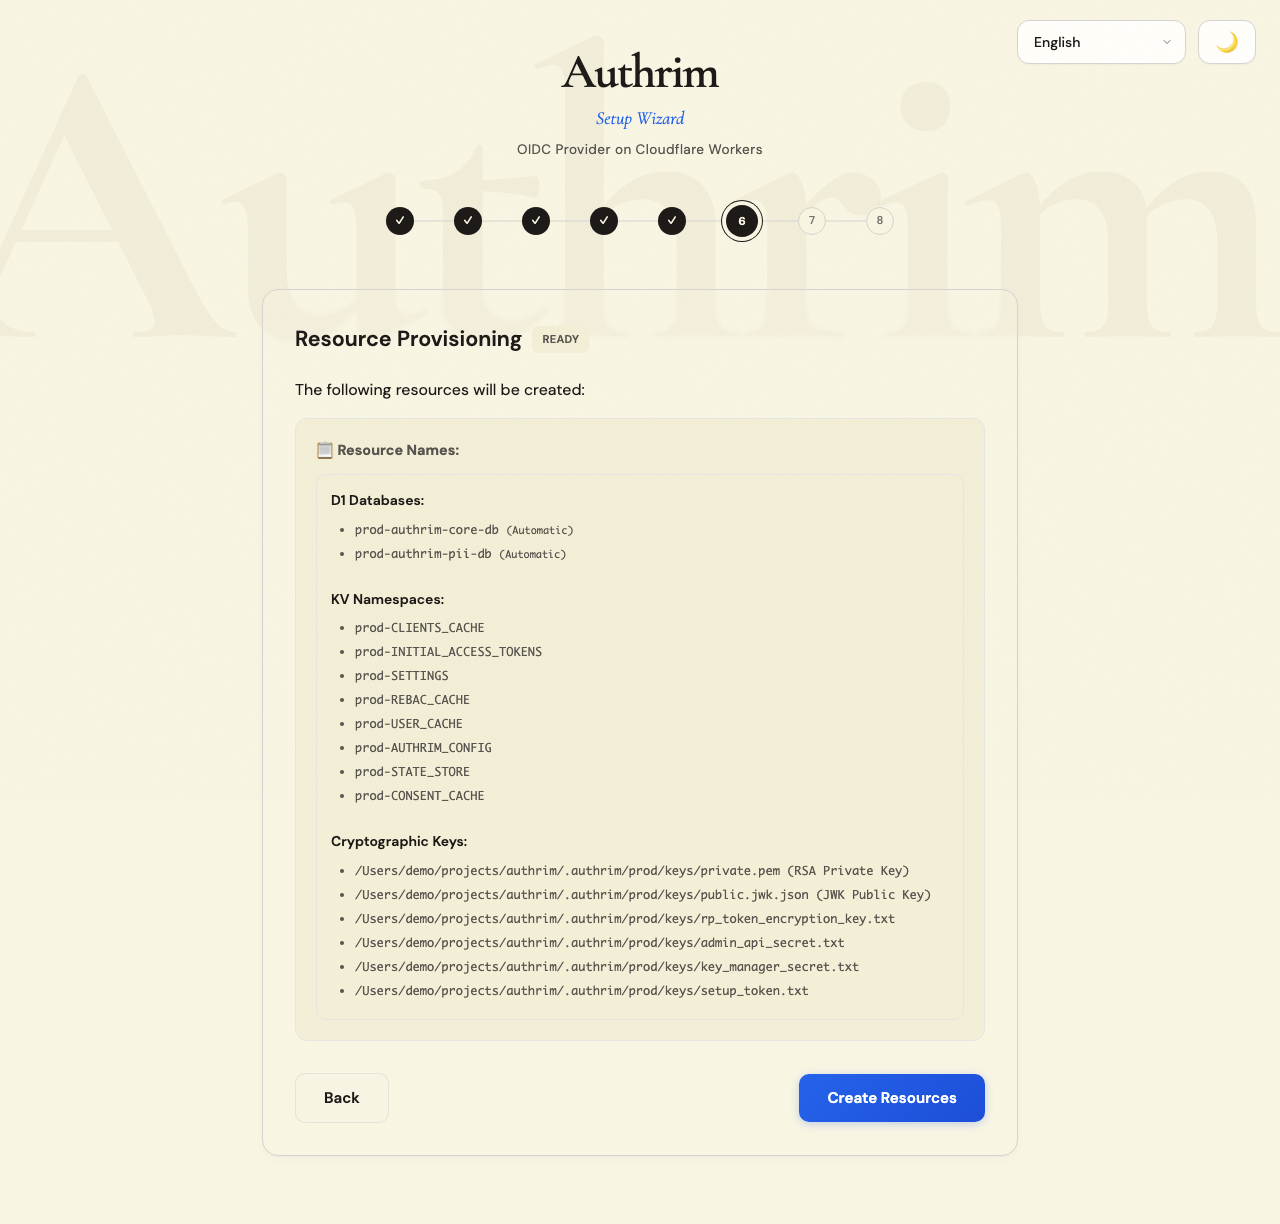
Review your configuration summary, then click Create Resources.
What gets created
Section titled “What gets created”| Resource | Purpose |
|---|---|
| D1 Databases | DB, DB_PII, DB_ADMIN; tenant-D1 slots when selected |
| KV Namespaces | Caches, generated configuration, tenant runtime registry snapshots, consent cache |
| Durable Objects | Sessions, auth codes, refresh rotation, PAR, DPoP, device/CIBA, SAML, flow state, rate limiting |
| RSA Keys | JWT signing for access tokens and ID tokens |
| AES Keys | Encryption for sensitive data at rest |
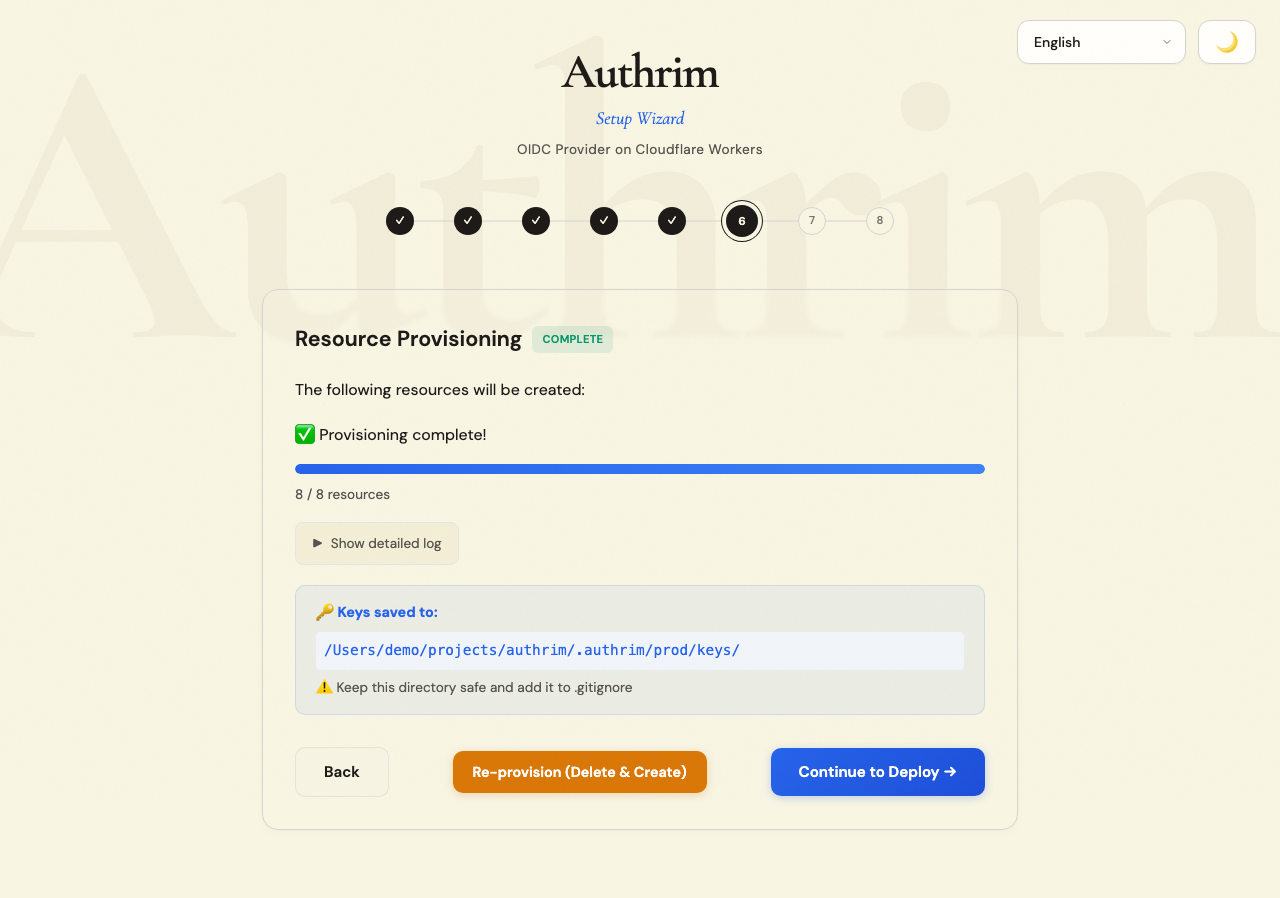
Provisioning typically takes 1-2 minutes. The wizard shows real-time progress.
If provisioning fails:
- Check your Cloudflare account has sufficient quota
- Ensure you have the necessary permissions
- Try again - transient errors are common with cloud APIs
Step 9: Deployment
Section titled “Step 9: Deployment”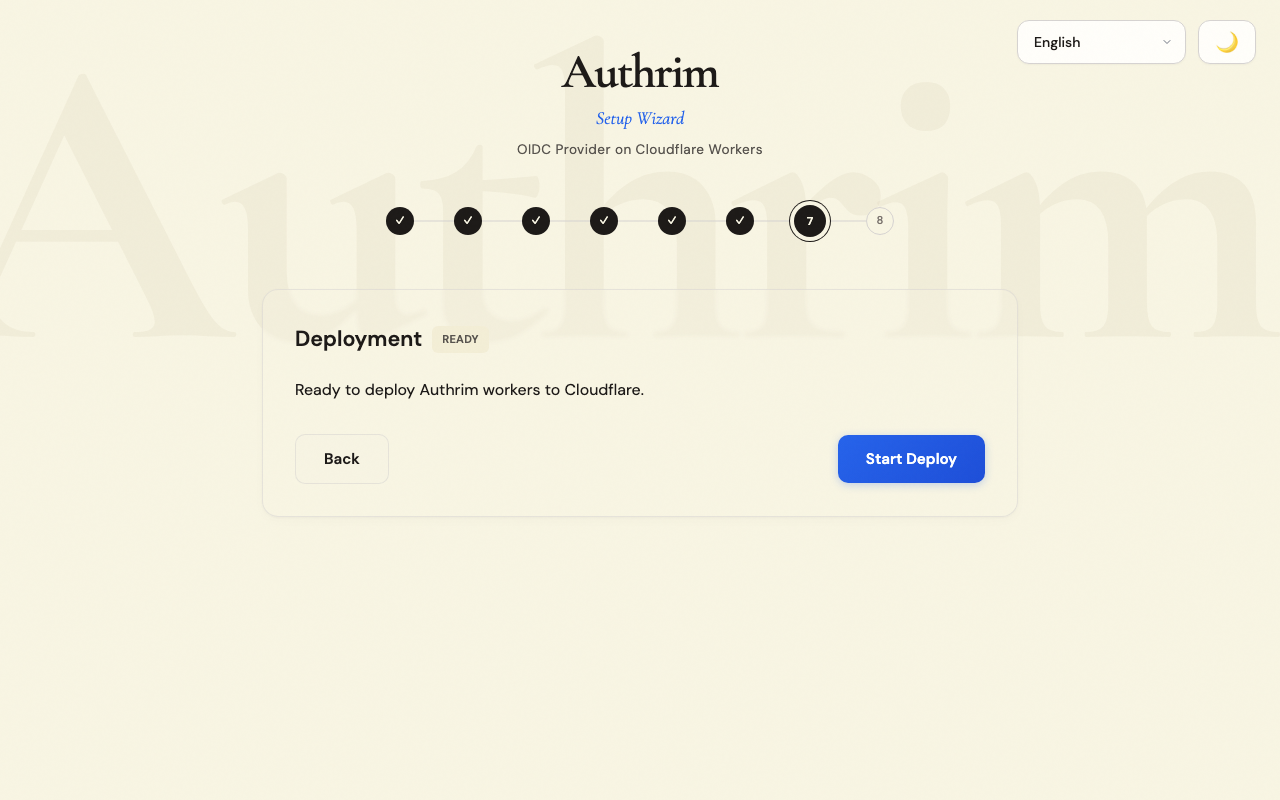
After provisioning, click Start Deploy to deploy the application.
Deployment process
Section titled “Deployment process”- Build: Compiles all TypeScript code
- Deploy Workers: Uploads API endpoints to Cloudflare Workers
- Deploy UI Workers: Uploads Login UI and Admin UI workers
- Run Migrations: Applies core, PII, admin, and selected tenant-D1 migrations
- Upload Secrets: Stores encryption keys securely
Deployment typically takes 3-5 minutes.
Step 10: Complete
Section titled “Step 10: Complete”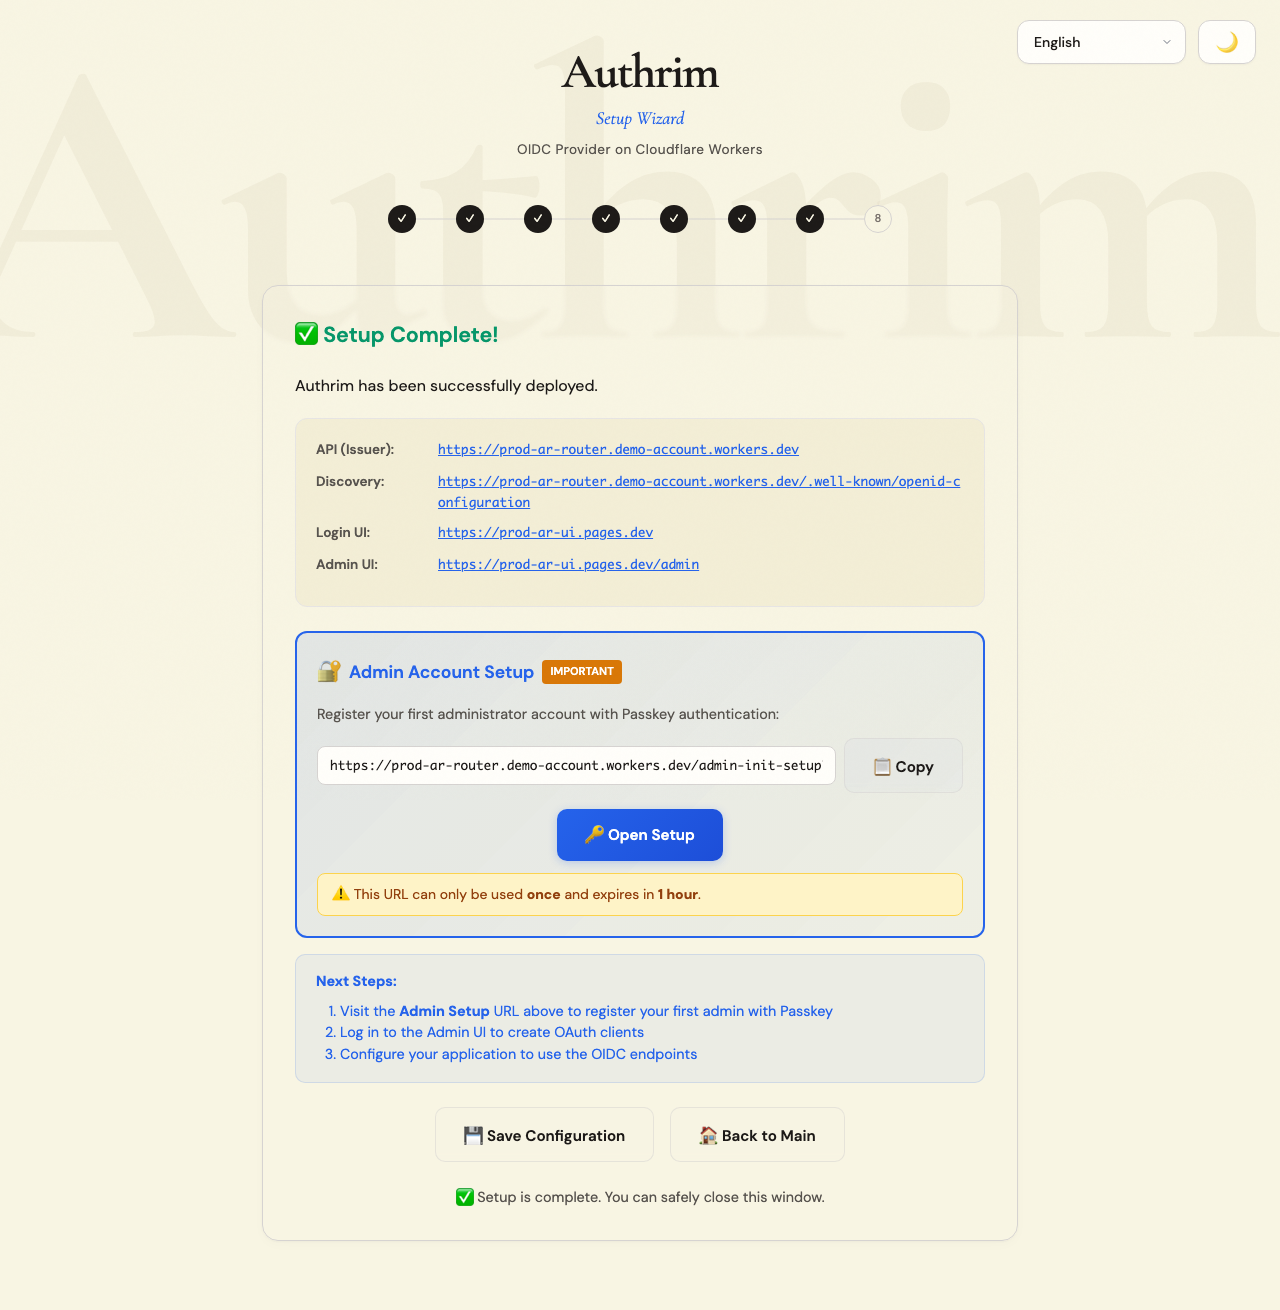
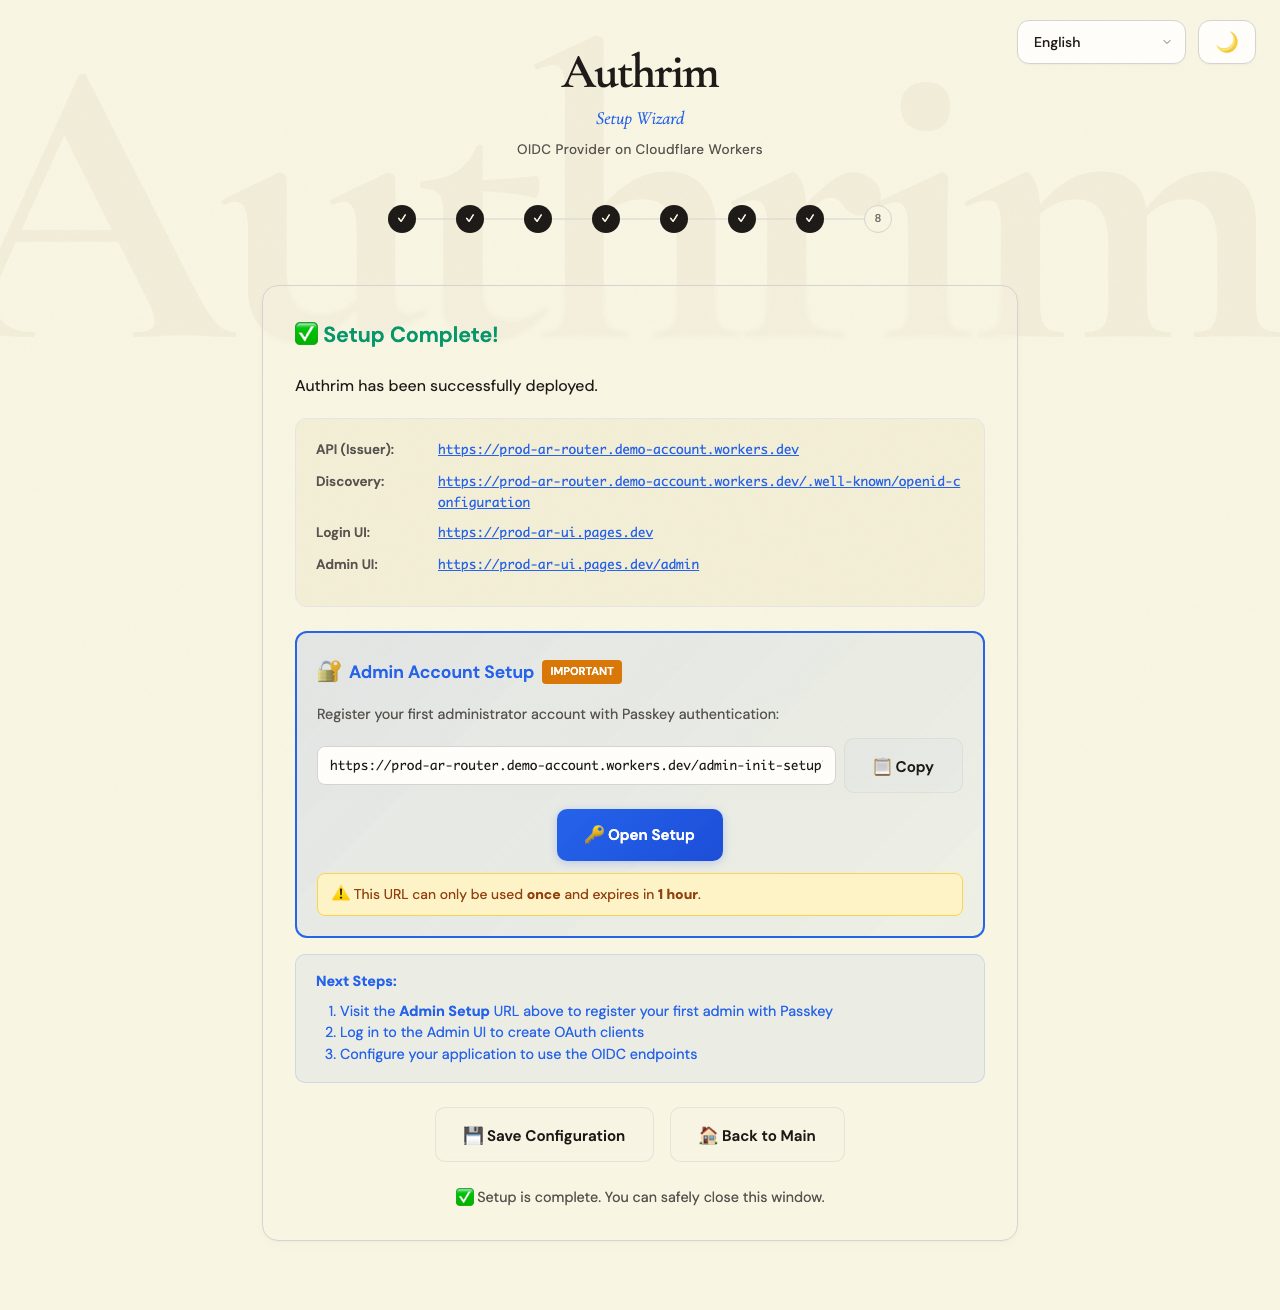
Your Authrim deployment is ready!
Important URLs
Section titled “Important URLs”| URL | Purpose |
|---|---|
| Issuer URL | Your OIDC provider endpoint. Use this in your application’s OIDC configuration. |
| Admin Setup | One-time URL to create the first administrator account. Visit this immediately! |
| Login UI | Where your users will log in |
| Admin UI | Dashboard for managing users, clients, and settings |
Immediate Next Steps
Section titled “Immediate Next Steps”-
Create Admin Account (Do this first!)
- Visit the Admin Setup URL shown on the completion screen
- Register using a Passkey (TouchID, FaceID, or security key)
- This URL expires and can only be used once
-
Log in to Admin UI
- Use your newly created admin account
- Explore the dashboard
-
Create Your First OAuth Client
- Go to Clients → Create Client
- Enter your application’s redirect URIs
- Save the Client ID and Secret
-
Test the Integration
- Configure your application with the Issuer URL and client credentials
- Test the login flow
Example: Configuring Your Application
Section titled “Example: Configuring Your Application”Use these values from the completion screen:
// Example OIDC configurationconst oidcConfig = { issuer: 'https://your-issuer-url', clientId: 'your-client-id', clientSecret: 'your-client-secret', redirectUri: 'https://your-app.com/callback', scope: 'openid profile email'};Command Line Options
Section titled “Command Line Options”# Use CLI mode instead of Web UInpx @authrim/setup --cli
# Load existing configurationnpx @authrim/setup --config ./authrim-config.json
# Specify language (en, ja, zh-CN, zh-TW, es, pt, fr, de, ko, ru, id)npx @authrim/setup --lang ja
# Specify environment directlynpx @authrim/setup --env stagingTroubleshooting
Section titled “Troubleshooting”Server fails to start
Section titled “Server fails to start”Port 3456 may be in use:
# macOS/Linuxlsof -ti:3456 | xargs kill -9
# Windowsnetstat -ano | findstr :3456taskkill /PID <PID> /F
“Wrangler not found”
Section titled ““Wrangler not found””npm install -g wranglerIf using a node version manager (nvm, fnm), ensure your global bin is in PATH.
”Not logged in to Cloudflare”
Section titled “”Not logged in to Cloudflare””wrangler loginIf login fails, try:
wrangler logoutwrangler loginDeployment fails with rate limit error
Section titled “Deployment fails with rate limit error”Cloudflare has API rate limits. Wait 1-2 minutes and click Retry.
Custom domain not working
Section titled “Custom domain not working”- Verify your domain is added to Cloudflare
- Check DNS records are properly configured
- Wait for DNS propagation (can take up to 24 hours)
- Confirm your account and plan support the domain and route configuration you selected
Database creation fails
Section titled “Database creation fails”- Check your Cloudflare account has D1 access
- Free accounts have limited D1 databases - delete unused ones
- Try a different region if one is experiencing issues
Related Documentation
Section titled “Related Documentation”- Installation - Manual installation guide
- Quickstart - Quick deployment overview